How to Enable Error Squiggles in VS Code

I'm passionate about programming and eager to share my knowledge with others. As a lifelong learner, I'm constantly seeking out new information and skills to improve my craft. Whether it's through teaching or creating projects, I strive to inspire and empower others to pursue their own programming journey.
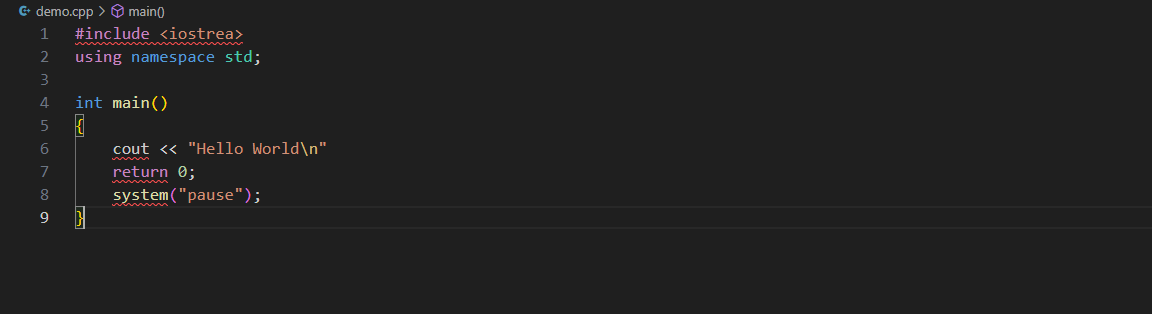
Hello fellow coder! Is your VS Code not showing you those helpful error squiggles? Don't worry; Today, we're going to learn how to enable those error squiggles through some easy steps. 🚀
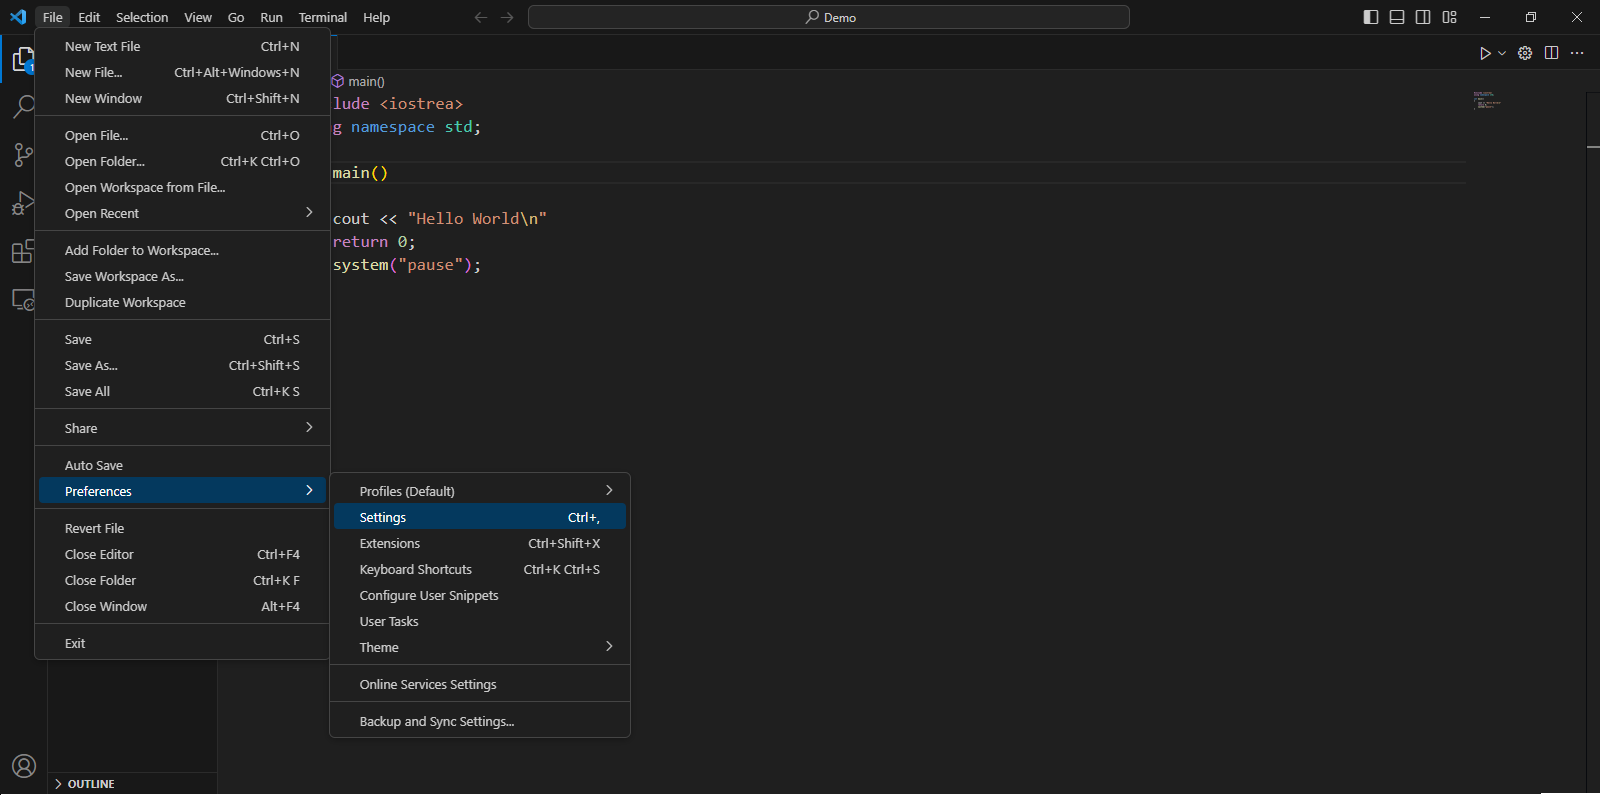
Step 1: Press CTRL +, on your keyboard to open the VS Code settings. You can also navigate to "File" > "Preferences" > "Settings."
Step 2: In the settings search box, type "error squiggles" to quickly locate the relevant setting.
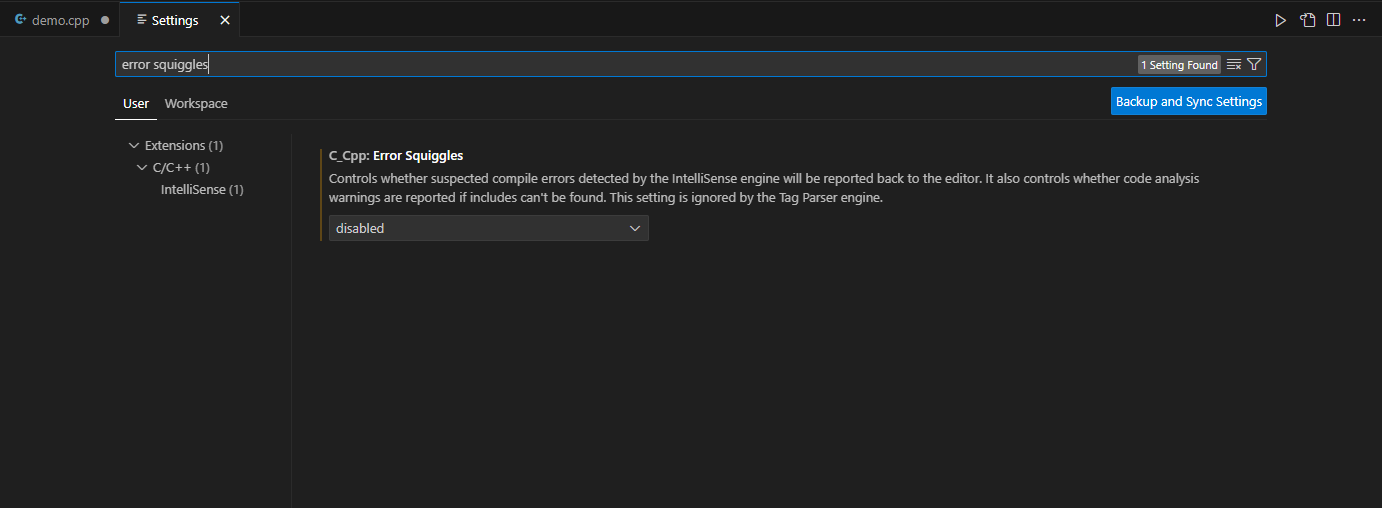
Step 3: Look for the setting named "C_Cpp: Error Squiggles" in the search results. Make sure that this option is enabled or set to "enabledIfIncludesResolve" (which is the default value).
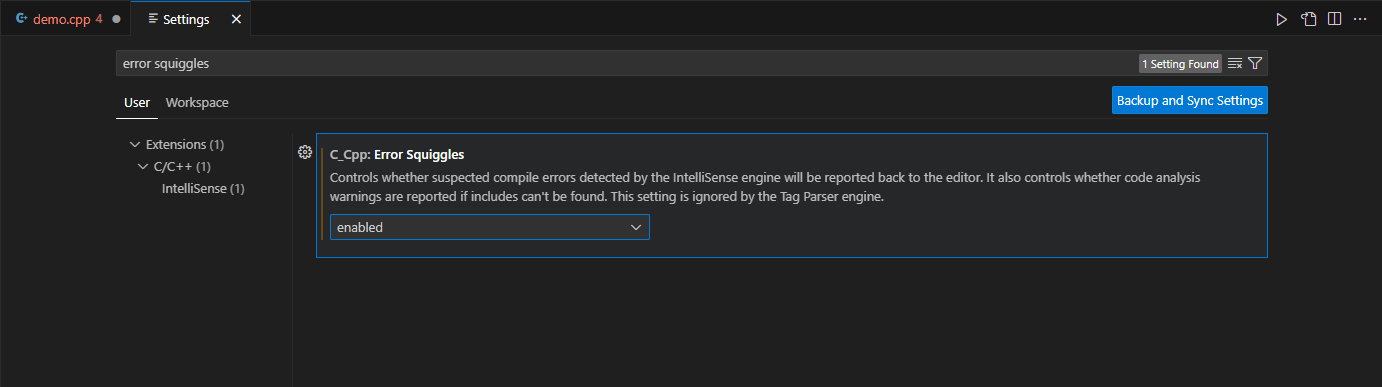
That's it! You've successfully enabled error squiggles in Visual Studio Code. Now, you'll see squiggly lines under your code when there are errors, making it easier to identify and fix issues as you write or edit your code.
You can now code with confidence and catch errors as soon as they occur, thanks to error squiggles in VS Code. Happy coding! 🚀🎯

